3D-printed horizontal-axis micro wind turbine : Différence entre versions
(→Design) |
|||
| Ligne 10 : | Ligne 10 : | ||
==Design== | ==Design== | ||
| + | In this part, we will explain the main design choices that we made | ||
| + | |||
===3D printer=== | ===3D printer=== | ||
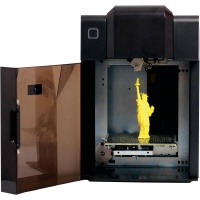
| + | [[Fichier:Up_mini.jpg|Micro-éolienne|200px|right]]The printer that we used is a [https://www.up3d.com/?r=mini Up Mini]. We chose this printer because it has a good precision of printing and uses a thermoplastic, the ABS. The ABS possesses better mechanical properties than the others thermoplastics available on the other printers. The ABS is more ductile and more resistant. The main constraint we will have to deal with with this printer is the maximum size of the pieces to print. Indeed, the printing volume of the Up Mini is of 120 x 120 x 120 mm. | ||
===Generator=== | ===Generator=== | ||
| + | |||
| + | The generator that we chose is a [http://www.maxonmotor.com/medias/sys_master/root/8807110639646/13-381-EN.pdf Maxon EC-40]. This generator is followed by a gearhead that allowed to increase the permitted maximum admission torque to 1.48Nm. It also enables some admission rotational speeds that are consistent with those of the hub untill 758.4rpm. An encoder connected to the generator allows to know at every moment its rotational speed. | ||
===Blades=== | ===Blades=== | ||
| + | |||
| + | [[Fichier:Pale_eclatee.png|Micro-éolienne|500px|right]] | ||
| + | |||
| + | Due to the printer choice, we were forced to create blades in several pieces. We decided to design two sets of blades. The first one has a 70cm diameter and blades are formed of 3 pieces. The second one possesses a 100cm diameter and blades are made of 4 pieces (see picture of assembly). To determine the shape of these blades, we used a matlab program that gives the form and the twist of the profiles as function of the radius. This matlab program takes as arguments: the type of profile used, the design wind speed, the design tip speed ratio and the desired rotor radius (for more details: see master's thesis). The implemented method is a improved version of the Blade Element Momentum method (BEM) | ||
===Hub=== | ===Hub=== | ||
Version du 13 octobre 2016 à 12:47
Pour la traduction française, voyez ici.
Sommaire
Objectives
Objectives of this project were deduced from two facts. The first one is that the renewable energies are more and more important in our society. They are one of the solutions we found at actual energetical and ecologial problems we have to deal with. The second one is that more and more Fab labs are created. These places allow everyone to realise self-designed objects. 3D printers are some machines among others that can be used to create these objets.
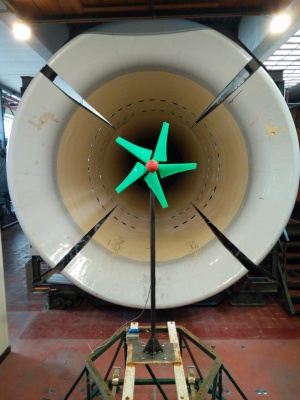
Based on these two facts, we defined the subject of our project: the design and test of a 3D-printed horizontal axis windturbine.
Design
In this part, we will explain the main design choices that we made
3D printer
The printer that we used is a Up Mini. We chose this printer because it has a good precision of printing and uses a thermoplastic, the ABS. The ABS possesses better mechanical properties than the others thermoplastics available on the other printers. The ABS is more ductile and more resistant. The main constraint we will have to deal with with this printer is the maximum size of the pieces to print. Indeed, the printing volume of the Up Mini is of 120 x 120 x 120 mm.
Generator
The generator that we chose is a Maxon EC-40. This generator is followed by a gearhead that allowed to increase the permitted maximum admission torque to 1.48Nm. It also enables some admission rotational speeds that are consistent with those of the hub untill 758.4rpm. An encoder connected to the generator allows to know at every moment its rotational speed.
Blades
Due to the printer choice, we were forced to create blades in several pieces. We decided to design two sets of blades. The first one has a 70cm diameter and blades are formed of 3 pieces. The second one possesses a 100cm diameter and blades are made of 4 pieces (see picture of assembly). To determine the shape of these blades, we used a matlab program that gives the form and the twist of the profiles as function of the radius. This matlab program takes as arguments: the type of profile used, the design wind speed, the design tip speed ratio and the desired rotor radius (for more details: see master's thesis). The implemented method is a improved version of the Blade Element Momentum method (BEM)


